Seafile,一个开源免费的可以搭建个人和企业私有网盘的程序。我们可以很便捷的在WEB环境中像安装CMS一样简单的安装。在这篇文章中,我们将会利用在Ubuntu 20.04环境中部署安装 Seafile网盘程序。当然,如果我们有WEB环境的话,可以直接下载部署。
这里,环境需要MySQL,nginx,seafile-server安装包,以及必须的依赖包。
1、安装数据库
sudo apt install mysql-server-5.7
这里我们安装数据库,以及配置数据库的安全。
sudo mysql_secure_installation
根据向导部署设置安全和账户。
2、安装Nginx
sudo apt install nginx
创建配置文件:
/etc/nginx/sites-available/seafile.conf
然后我们配置文件:
server{
listen 80;
server_name example.com;
rewrite ^ https://$http_host$request_uri? permanent;
proxy_set_header X-Forwarded-For $remote_addr;
}
server {
listen 443 ssl http2;
ssl on;
ssl_certificate /etc/ssl/cacert.pem;
ssl_certificate_key /etc/ssl/privkey.pem;
server_name example.com;ssl_protocols TLSv1 TLSv1.1 TLSv1.2;
add_header Strict-Transport-Security “max-age=31536000; includeSubdomains”;
add_header X-Content-Type-Options nosniff;
add_header X-Frame-Options DENY;
ssl_session_cache shared:SSL:10m;
ssl_ciphers “EECDH+AESGCM:EDH+AESGCM:AES256+EECDH:AES256+EDH !RC4”;
ssl_prefer_server_ciphers on;fastcgi_param HTTPS on;
fastcgi_param HTTP_SCHEME https;location / {
fastcgi_pass 127.0.0.1:8000;
fastcgi_param SCRIPT_FILENAME $document_root$fastcgi_script_name;
fastcgi_param PATH_INFO $fastcgi_script_name;fastcgi_param SERVER_PROTOCOL $server_protocol;
fastcgi_param QUERY_STRING $query_string;
fastcgi_param REQUEST_METHOD $request_method;
fastcgi_param CONTENT_TYPE $content_type;
fastcgi_param CONTENT_LENGTH $content_length;
fastcgi_param SERVER_ADDR $server_addr;
fastcgi_param SERVER_PORT $server_port;
fastcgi_param SERVER_NAME $server_name;
fastcgi_param REMOTE_ADDR $remote_addr;access_log /var/log/nginx/seahub.access.log;
error_log /var/log/nginx/seahub.error.log;
fastcgi_read_timeout 36000;
client_max_body_size 0;
}location /seafhttp {
rewrite ^/seafhttp(.*)$ $1 break;
proxy_pass http://127.0.0.1:8082;
client_max_body_size 0;
proxy_connect_timeout 36000s;
proxy_read_timeout 36000s;
proxy_send_timeout 36000s;
send_timeout 36000s;
proxy_request_buffering off;
}location /media {
root /home/sfadmin/sfroot/seafile-server-latest/seahub;
}
}
这里我们需要修改成自己的域名。以及配置SSL证书,证书的获取我们自己想办法,然后文件对应放置就可以。
禁用默认站点配置,并启用您刚刚创建的站点:
sudo rm /etc/nginx/sites-enabled/default
sudo ln -s /etc/nginx/sites-available/seafile.conf /etc/nginx/sites-enabled/seafile.conf
然后重启生效。
sudo nginx -t
sudo systemctl restart nginx
3、安装Seafile
mkdir ~/sfroot && cd ~/sfroot
创建目录。
然后我们到最新程序官方下载:https://www.seafile.com/en/download/
下载之后解压。然后我们为Seafile安装依赖包。
sudo apt install python2.7 libpython2.7 python-setuptools python-imaging python-ldap python-mysqldb python-memcache python-urllib3
然后运行:
cd seafile-server-* && ./setup-seafile-mysql.sh
然后执行生效。
./seafile.sh start
./seahub.sh start-fastcgi
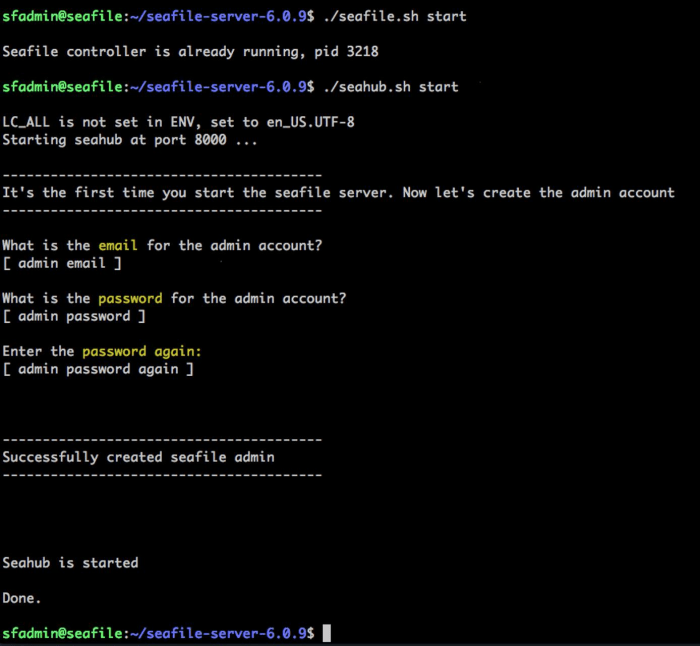
执行后,我们可以看到配置。

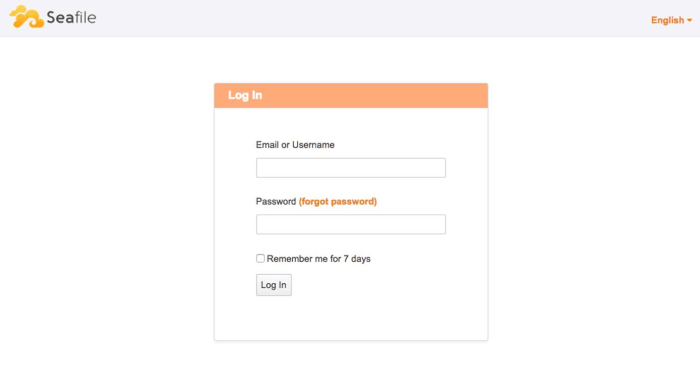
然后我们可以用配置的域名打开。

然后我们根据向导设置。
4、设置Seafile自动启动
创建文件:
/etc/systemd/system/seafile.service
然后文件配置:
[Unit] Description=Seafile Server
After=network.target mysql.service [Service] Type=oneshot
ExecStart=/home/sfadmin/sfroot/seafile-server-latest/seafile.sh start
ExecStop=/home/sfadmin/sfroot/seafile-server-latest/seafile.sh stop
RemainAfterExit=yes
User=sfadmin
Group=sfadmin [Install] WantedBy=multi-user.target
再配置:
/etc/systemd/system/seahub.service
配置文件:
[Unit] Description=Seafile Hub
After=network.target seafile.service [Service] Type=oneshot
ExecStart=/home/sfadmin/sfroot/seafile-server-latest/seahub.sh start-fastcgi
ExecStop=/home/sfadmin/sfroot/seafile-server-latest/seahub.sh stop
RemainAfterExit=yes
User=sfadmin
Group=sfadmin [Install] WantedBy=multi-user.target
然后设置启动生效。
sudo systemctl enable seafile
sudo systemctl enable seahub
这样我们就可以实现重启也无关紧要可以正常打开Seafile。
参考:https://www.linode.com/docs/guides/install-seafile-with-nginx-on-ubuntu-1604/#configure-and-install-seafile
未经允许不得转载:老蒋玩运营 » Ubuntu 20.04 搭建私有个人网盘Seafile

 微信关注,获取新知


